
Wooden Playpen Setup: How to Set One Up at Home, Step by Step
By The Poco Koko team · Updated Nov 17, 2026 · 5 min read

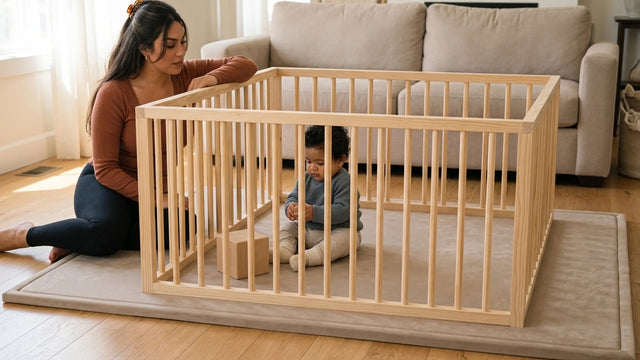
Shown in our 6.5 × 10 ft size, on the way.
On this page
To set up a wooden playpen, pick a flat spot you can see from where you sit, lay a large one-piece mat down first, and stand the playpen in the middle with soft mat showing on every side. Then lock every panel, test the gate latch, and keep the inside bare, because no extra padding goes inside a playpen that already sits on a soft mat.
This guide takes you through each step in order, from choosing the spot to the quick checks that keep the setup steady day after day. It also explains which mat size a common wooden playpen fits on and why the inside should stay simple.
Before you start
Wooden playpens usually come as a set of panels that link together, often with one gate panel that opens and closes. Some stand on small feet and others sit flat on the floor on a base rail. The steps below work for most of them, but your playpen's own instructions always come first.
- Read the manual: check how the panels connect, which way the gate swings and how the latch locks.
- Check for recalls: the Consumer Product Safety Commission urges parents to check SaferProducts.gov for recalls on nursery products, including ones bought second-hand.
- Count the parts: make sure every panel, pin and connector is in the box before you start.
- Clear the space: you'll need room to lay the mat flat and walk all the way around it.
If you are still choosing what goes under the playpen, our playpen mat guide compares the main options.
Step 1: Choose the spot
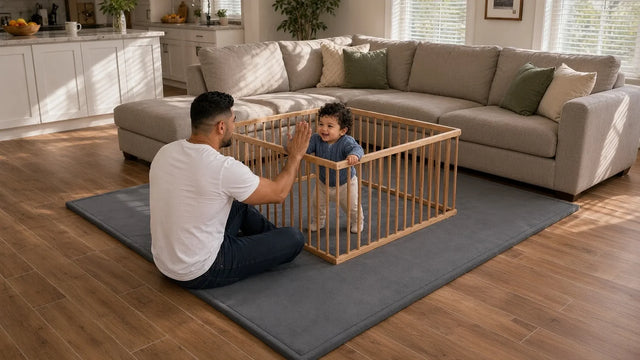
Where the playpen goes matters as much as how carefully it is built. Pick a stretch of floor you can see easily from the sofa or the kitchen, so a quick glance tells you how play is going.
- Flat and level: a level floor helps every panel stand straight.
- Away from cords and blinds: keep it clear of lamp cords, window blind cords and outlets a child could reach through the slats.
- Away from heat: stay back from heaters, radiators and the fireplace.
- Away from furniture: leave a gap between the panels and any shelf, table or TV stand a child could grab and pull.
In many living rooms, the open floor in front of the sofa works well. Our guide to play mat placement in the living room has more ideas for fitting a mat around furniture.

Large play mats
Step 2: Lay the mat first
The mat goes down before the playpen, and it goes under the whole thing, not inside it. Our Living Room mat is 5 × 6.5 ft (59 × 79 in), and it can take a 50 × 50 in playpen. A wooden playpen sits most steadily on it, because the panels stand on one smooth, cushy surface with no seams or puzzle tiles to pull apart.
Centered on that mat, a 50 × 50 in playpen leaves about 4.5 in of mat along each long side and about 14.5 in at each end. Our 50x50 playpen mat guide shows how to measure your own playpen and work out the border. A 50 × 50 in mat size is also on the way.
- Vacuum the floor. Grit under a mat is easy to miss.
- Unroll the mat top side up. A new mat may need a little time to relax flat after unrolling.
- Air it out. A new-foam smell is normal at first. Open a window and let it air out for a few hours.
- Check the grip. The non-slip backing stays put on hardwood, tile and laminate.
Step 3: Build the panels on the mat
Assemble the playpen right on top of the mat, so you don't have to drag the finished frame into place later. Dragging a wooden frame across the mat can pull the mat out of line or bunch it up underneath.
- Link one panel at a time: push each connector all the way in, the way the manual shows.
- Shape it last: close the square or rectangle only when every panel is linked.
- Check the feet: each foot or base rail should sit flat on the mat, with nothing tucked under it.
Step 4: Center it and leave room around it
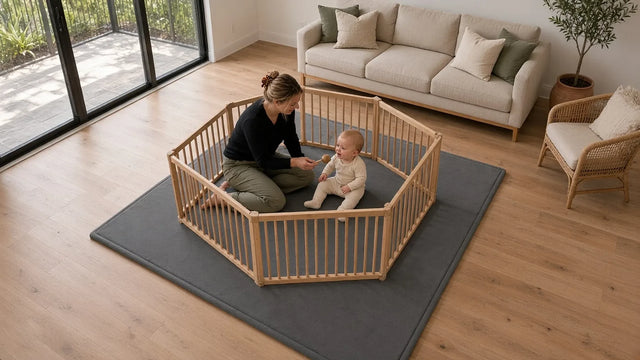
Slide the playpen gently until the border looks even on every side. That border keeps the panels well away from the mat's edge, and it gives you a comfortable, soft place to kneel outside the fence.

Leave walking room around the mat too, so nobody has to step over the edge to cross the room. If the room feels tight, try turning the whole setup a quarter turn before you start moving furniture.
Step 5: Check the gate latch
The gate is the one part of the playpen that moves every day, so it is the part to check most often and most carefully.
- Open and close it: the gate should swing freely and close fully.
- Listen for the latch: it should lock firmly, the way the manual describes.
- Pull on it: give the closed gate a firm tug from the inside. It should stay shut.
- Check the hinges: look for loose screws or a hinge that wobbles.
Step 6: Give it a shake test
Push gently on each panel from the inside and from the outside. The playpen should feel steady, and it should not tip, rock or come apart at a connector. If a panel leans, check that its foot is sitting flat and that the connector is pushed all the way in.
Keep the inside bare
With a soft mat underneath, there is no reason to add anything soft inside the panels. A play yard never gets extra padding inside. The CPSC's play yard tips say to use only the mattress sold with the play yard, and to keep pillows, quilts, comforters and cushions out of play yards.

- No pillows or cushions: the mat underneath already gives a soft floor.
- No blankets or extra pads: keep the floor inside open and flat.
- A few toys only: a couple of wooden or cloth toys are plenty.
- Nothing to climb on: big toys or boxes can turn into a step over the top.
Quick checks to keep it steady
A setup that was steady on the first day can loosen a little over time as panels get pushed and pulled. Once a week, check the gate latch, push on each panel and look closely at every connector. Run a hand along the wood for cracks or rough spots, and stop using the playpen until anything loose or broken is fixed the way the manufacturer says.
Our step by step guide to putting a playpen on a play mat covers what to do if the playpen ever shifts. A wooden playpen on a play mat is a place to play with a grown-up nearby. For awake, supervised play. Not for sleep.
FAQ
Do I need a mat under a wooden playpen?
You don't have to, but a large one-piece mat under the playpen gives a soft floor inside, room to play outside the panels, and a non-slip backing that stays put on hardwood, tile and laminate.
Will a 50 × 50 in wooden playpen fit on the Living Room mat?
Yes. The Living Room mat is 5 × 6.5 ft (59 × 79 in), so it can take a 50 × 50 in playpen with about 4.5 in of mat along each long side and about 14.5 in at each end.
Should I put padding inside the playpen?
No. Keep the inside bare. The mat goes under the playpen, and no extra padding, pillows or cushions go inside.
How often should I check the gate latch?
Check it every time you set the playpen up, and give it a quick test once a week. If it stops locking firmly, stop using the playpen until it is fixed.
Can my baby nap in a wooden playpen on a play mat?
No. A playpen on a play mat is for play, with a grown-up close by. For awake, supervised play. Not for sleep.
Browse our large play mats to find one that sits under your wooden playpen with room to spare.
Written by the Poco Koko team.
Keep reading in Playpens
- Free shippingContiguous U.S. (48 states)
- Pre-orderShip timing is on each mat's page
- 30-day returnsOn unused mats
- 1-year warrantyOn every mat